
Strategy Tips
Advanced tactics to accelerate your civilization
Already know the basics? These strategies will help you progress faster, prestige more efficiently, and make the most of every game system. Tips are organized from early-game through late-game and endgame.
Early Game — Getting Started Right
#1Prioritize Grid Expansion
Your 3x3 starting grid fills up fast. Saving resources for Grid Expansion upgrades should be your top priority. A 4x4 grid takes you from nine cells to sixteen, and 5x5 changes the game entirely. More space means more tiles, more merges, and less chance of gridlock.
#2Never Let Storage Cap Out
If your storage is full, every resource your tiles produce is wasted. Build Stockpiles early and merge them aggressively. A single high-tier Stockpile is worth more than several low-tier ones taking up grid space. Watch the resource bars at the top of the screen — if they are full, you are losing production.
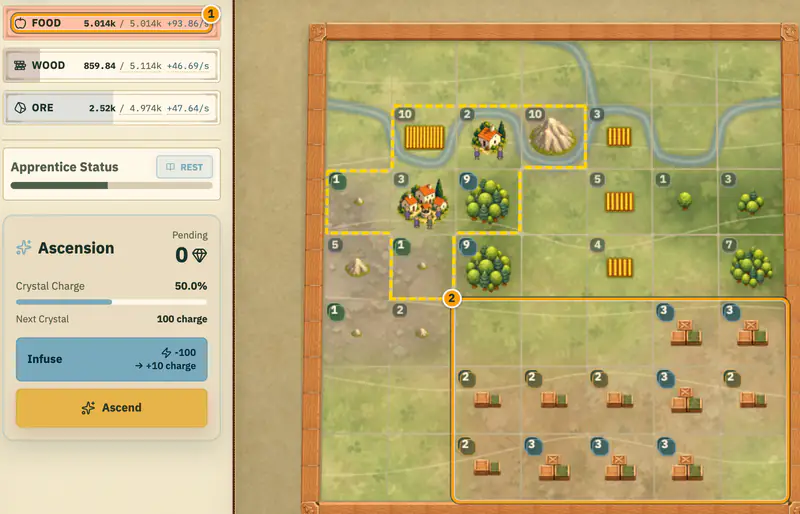
#3Unlock Ore Before You Stall
Ore Deposits unlock mid-tier upgrades that gate most of your progression. Many players over-invest in Food and Wood early on, then hit a wall when they need Ore. Start spawning Ore tiles as soon as the upgrade becomes available, even if it feels slow at first.
#4Merge Unworked Tiles First (and Check Your Work Halos)
Resource tiles only produce when worked by a settlement — hover or tap a Villager, House, Village, or Castle to see its dashed gold work halo. Resource tiles produce tier × 1.1^(tier−1)/s before multipliers: merging two worked Tier 1 tiles into one worked Tier 2 increases output (2.0/s → 2.2/s), but merging two worked tiles of Tier 2+ replaces two streams with a single ~1.65x stream (a ~17% drop). Always merge unworked tiles first, or drag an unworked tile onto a worked one, and keep one or two empty cells as a merge buffer.
Mid Game — Prestige Strategy
#5Do One Final Merge Push Before Resettling
Resettlement Culture scales with your total settlement population, while each Resettlement records a past society whose permanent Tribute Gold/s scales with the cube of the highest tile tier on the board when you resettle (0.001 × tier³/s). Right before clicking Resettle, merge your highest-tier tiles one last time — even Stockpiles or worked producers that would normally lose per-second output — to lock in a higher Tribute tier for that run.
#6Invest Early Culture in Fellow Pilgrims and Traditions
Fellow Pilgrims starts every run with a Villager, House, or Village already on the board, and Traditions provide flat Food, Wood, and Ore per second from second zero. Together with Divine Mandate (Auto-Scout) and Chief's Order (Apprentice), they turn a slow post-reset rebuild into an instant start, while Cultural Renown (+50% Culture per level) multiplies every payout that follows.
#7Gold Upgrades Compound Across the Run
Early on, Taxes (+1 to +3 Gold/s per population) and Secure Vaults (+50 Gold cap per Stockpile tier per level) build the Gold engine you need for the Magic Book and Mage Tower. After Ascension, Reinvestment multiplies all Food, Wood, and Ore production by 1.1x per level (up to 6.73x at level 20).
#8Control the Apprentice
The basic Apprentice merges any matching pair it sees, which can collapse two worked tiles into one. Unlock Smart Apprentice early to protect worked tiles, and add Space Conscious Apprentice once you unlock Magic so Stockpiles only merge when the grid is full. With Apprentice Control, you can also toggle [Work] on individual tiles to pin them in place.
Late Game — Magic and Ascension
#9Favour Shorter Crystal Runs Over Marathon Grinds
The Mana required to charge each pending Magic Crystal in a single Ascension grows quadratically (100 × n²: 100 for the first, 400 for the second, 900 for the third). Until you have more levels in Mana Monolith and Ritual of Capacity, ascending once the next crystal slows down earns far more Crystals per hour than stretching one run for days.
#10Use Fission to Shape Pairs — and Upheaval to Cash Out
Fission (2,000 Mana) splits a tile into two tiles one tier lower; it does not multiply total value, so save it for creating a missing merge partner or splitting one producer into two worked cells.
Spoiler: End-of-Run Crystal Burst Trick (Conservation of Magic)
Once you own Conservation of Magic and Mana Syphon, casting Magical Upheaval (100 Mana) on a tile refunds 1 Mana per theoretical merge inside it (2^(tier−1) − 1). Right before Ascending or Resettling on a deep run, cast Upheaval on your highest-tier Stockpiles and tiles (Tier 8+): the massive Mana refund overflows your pool and funnels straight into extra Magic Crystals via Mana Syphon.
#11Batch Artifact Purchases Before Every Ascension
Once you unlock the Department of Magical Appraisals, Artifacts are drawn randomly for Gold (starting at 1M Gold and scaling by 1.3x per pull), and Ascending resets the Gold price back to 1M. Always spend your banked Gold on Artifacts right before you Ascend.
Spoiler: Interest Accumulator & Artifact Imbuement Tips
Your guaranteed first Epic artifact is the Interest Accumulator, which compounds your current Gold every tick. Stay near your Gold cap so interest runs at peak speed, then buy Artifacts down to where interest is still comfortable before letting the bank refill. Later, once an artifact reaches level 10 and you buy the Artifact Phylactery (100M Culture), imbuing it at the Citadel consumes the Phylactery and performs a full Citadel reset to promote that artifact one rarity higher, boost its scaling, and remove copies of its marbles from the drop pool so your remaining artifacts level up faster.
Endgame — Citadel, Rituals & Conquest
#12Build the Citadel — and Keep One Merge Slot Open
The Citadel takes ten levels of Build Citadel (100M Ore each, plus 10k to 100k Mana — requiring 100,000 Mana cap for level 10). Its center generates Knowledge (tier²/s) while its grid holds Libraries (Knowledge cap) and Theatres (Culture cap). Unlike the Surface, the Citadel has no Upheaval spell and cannot merge-on-drop from the dock when full — always keep at least one free slot or mergeable pair on the Citadel grid before buying a new Tier 1 Library or Theatre.
Spoiler: Citadel Imbuement, Milestones & Transcension
When your Citadel is complete and your Knowledge and Culture bars are full, click the Citadel center tile to Imbue it. Imbuing resets the Citadel for a new build cycle, raises its permanent tier (scaling Knowledge/s as N²), and awards permanent Citadel Milestones at tiers 1–10 and every 5 tiers up to 100 (granting free Knowledge/Culture capacity, Crystal multipliers, and auto-buyers). Reaching Citadel Tier 100 unlocks Transcension, banking 1 Star Piece per 100 Conquest landmarks cleared for the permanent Astral Tree.
#13Follow a Proven Ritual Priority
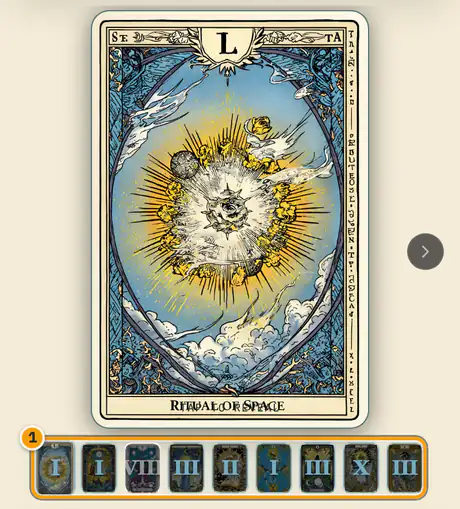
With nine Rituals competing for your Magic Crystals, start with Ritual of Space (1 Crystal for +1 grid width), then Ancient Grimoire (2 Crystals for a mastered Magic Book) and the automation rituals (Assistance, Scouting, Intellect, and Bureaucratic Ritual). From there, save for Ritual of Capacity (40 and 200 Crystals for 10x and 100x storage caps, which unlock higher Mana Monolith levels) alongside Ritual of Culture and Ritual of Quality.
#14Master Underground Storage, Forges & The March
Unlocking Subterranean Stockpiles moves all Stockpiles to the Underground layer so your Surface board can dedicate every cell to settlements and production.
Spoiler: Apprentice-Proof Forges & Conquest Muster Tactics
Forge Layouts (Smelting): Each worked Workshop (Forge) refines up to 2 adjacent Ore Deposits into Metal, and each stream's refine rate scales with the tier and yield of the connected Ore Deposit feeding it (consuming 10 Ore per 1 Metal from your stockpile). Seat your highest-tier Ore Deposits beside worked Workshops, keep at least one worked Ore Deposit or passive Ore source unconnected to keep your Ore stockpile fed, and stagger the tiers of the Ore Deposits flanking your Forges (e.g. T11 and T12) with Auto-Scout off so the Apprentice can stay active merging Underground Stockpiles without collapsing your two streams into one.
Muster Grounds & The March: Click any unit tile on the Muster Grounds (watch for the red dot) to open its Training & Class Promotion sheet. Always merge Tier 1 regiments into Tier 2s first (1 + 1 = 2 soldiers, zero loss); only merge Tier 2+ when your Muster board is full, as higher merges trade soldier count for space (and lower future Valor and settlement-resource recruit costs, while Metal recruit costs track your peak host). When pushing a tough landmark wall, stay on The March screen and time Sound the Advance so waves charge together.
General Efficiency Tips
#15Claim Offline Earnings Regularly
Offline earnings accumulate for up to twelve hours per absence, but they remain capped by your storage limits. Expand your Underground Stockpiles before logging off for the night so your morning claim doesn't overflow.
#16Time Your Boost Charges
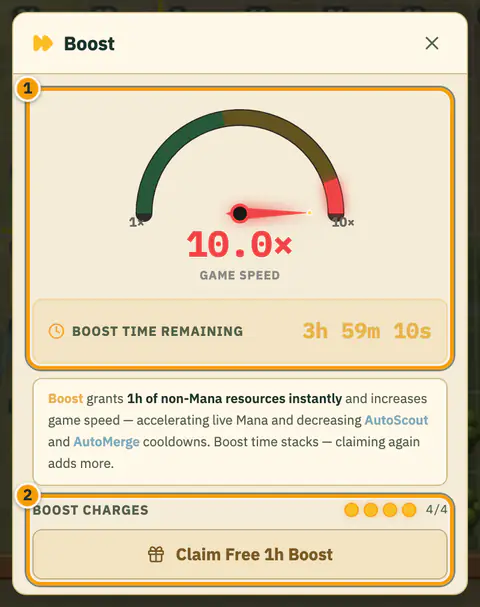
Boosts draw on a pool of up to four charges that refills one charge every six hours, with one free claim per day. Each claim pays an instant one-hour burst of non-Mana resources (including Metal if your Forges are running) and adds an hour of up to 10x game speed. Trigger boosts when your storage bars have plenty of headroom and your production multipliers are set up.
#17Always Merge Villagers Before Spawning More
Settlements merge across four tiers: Villager (1 pop, 1x right cell) → House (2 pop, 1.5x right & left) → Village (4 pop, 2x 4 orthogonal cells) → Castle (8 pop, 4x all 8 neighbors). Because spawning a new Villager doubles the next spawn cost per population point and adds +1/s Food upkeep, never spawn from the dock while two matching settlements on your board can be merged.
#18Plan Your Grid Layout
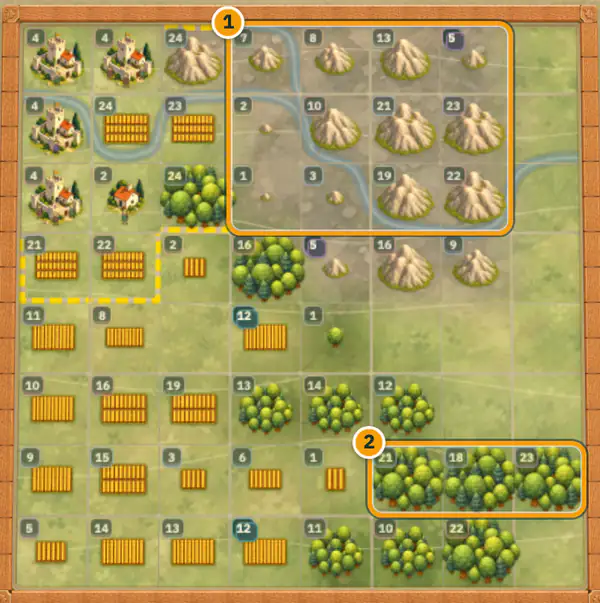
Tiles the Scout spawns are attracted to neighboring tiles of the same type. Use this to your advantage by clustering similar tiles together. This creates natural merge chains and reduces the amount of manual rearranging you need to do.
Keep Reading
The MergeCiv Handbook: Beginner's Guide · Merge Strategy · Resource Guide · Resettlement & Culture · Ascension & Magic · Underground & Citadel · Conquest & The Forge · Offline & Boost Math